Appearance


Learn about extension elements in a Business Process, and use them to configure industry extension nodes.
Process extension elements are extensible component capabilities provided by the process platform. Business teams can register industry application capabilities as business nodes on the process canvas based on their business features and industry requirements. Then administrators can drag these nodes directly into process orchestration.
Extension elements enhance personalized process customization. With extension elements, you can connect order acceptance, dispatch, service, follow-up, evaluation, sign-off, and other industry business actions to a process without waiting for a process platform release. This makes Business Process design more aligned with real operations.
On the Business Process canvas, click Extension on the left to view connected industry extension nodes. After you drag an extension element to the canvas, configure the business object, task data, Operation Type, operation rules, operation interface, operation buttons, and Task Handler in Node Settings on the right.
Core values of extension elements include:
Extension elements are suitable for scenarios where Business Process differences are significant, many industry handling actions exist, or business application capabilities must be connected flexibly.
| Scenario | Description | Example |
|---|---|---|
| Manufacturing | Optimizes after-sales service and on-site service processes, and improves Work Order handling efficiency and service quality | Service Work Order acceptance, Work Order assignment, On-site Repair, On-site Standard Operation, Service Evaluation |
| SFA in-sales business | Connects key actions in the in-sales process chain to improve process flexibility and collaboration efficiency | CPQ, contract signing, Sales Order, shipping order, outbound order, Payment Plan, receivables order, Invoice Application, Payment Collection |
| Healthcare | Customizes patient diagnosis and treatment processes, and connects business steps in the treatment journey | Registration, consultation, inspection, diagnosis, treatment, discharge |
| Finance | Orchestrates compliance, risk control, and Account Management processes | Risk assessment, loan approval, Account Management |
Available extension elements can vary by tenant or industry package. Use the actual page as the source of truth.
After you open the Business Process configuration page, click Extension in the left toolbar of the process canvas. The system opens the Extension elements panel.
The extension elements panel displays extension nodes connected by industry teams. You can search or browse by group, and then drag nodes to the process canvas.
In the screenshot, extension elements are grouped by Business Scenario. Common groups include:
| Group | Description | Example nodes |
|---|---|---|
| Service app | Internal business nodes for enterprise personnel to handle service-related business | Assign engineer, assign service group, assign Service Provider, Service Team Internal Assignment, engineer accepts order, On-site Standard Operation, inspection group, service report, Service Evaluation, service fee confirmation, service follow-up, service product consumption, repair part sign-off, repair part return |
| Service Provider portal | Nodes for External Service Provider collaboration, used by Service Provider users to handle process tasks | Assign Service Provider, engineer accepts order, On-site Standard Operation, Service Evaluation |
| Terminal user portal | External terminal user nodes, used by Accounts or terminal users to handle process tasks | Terminal user handling, terminal user task, Account sign-off |
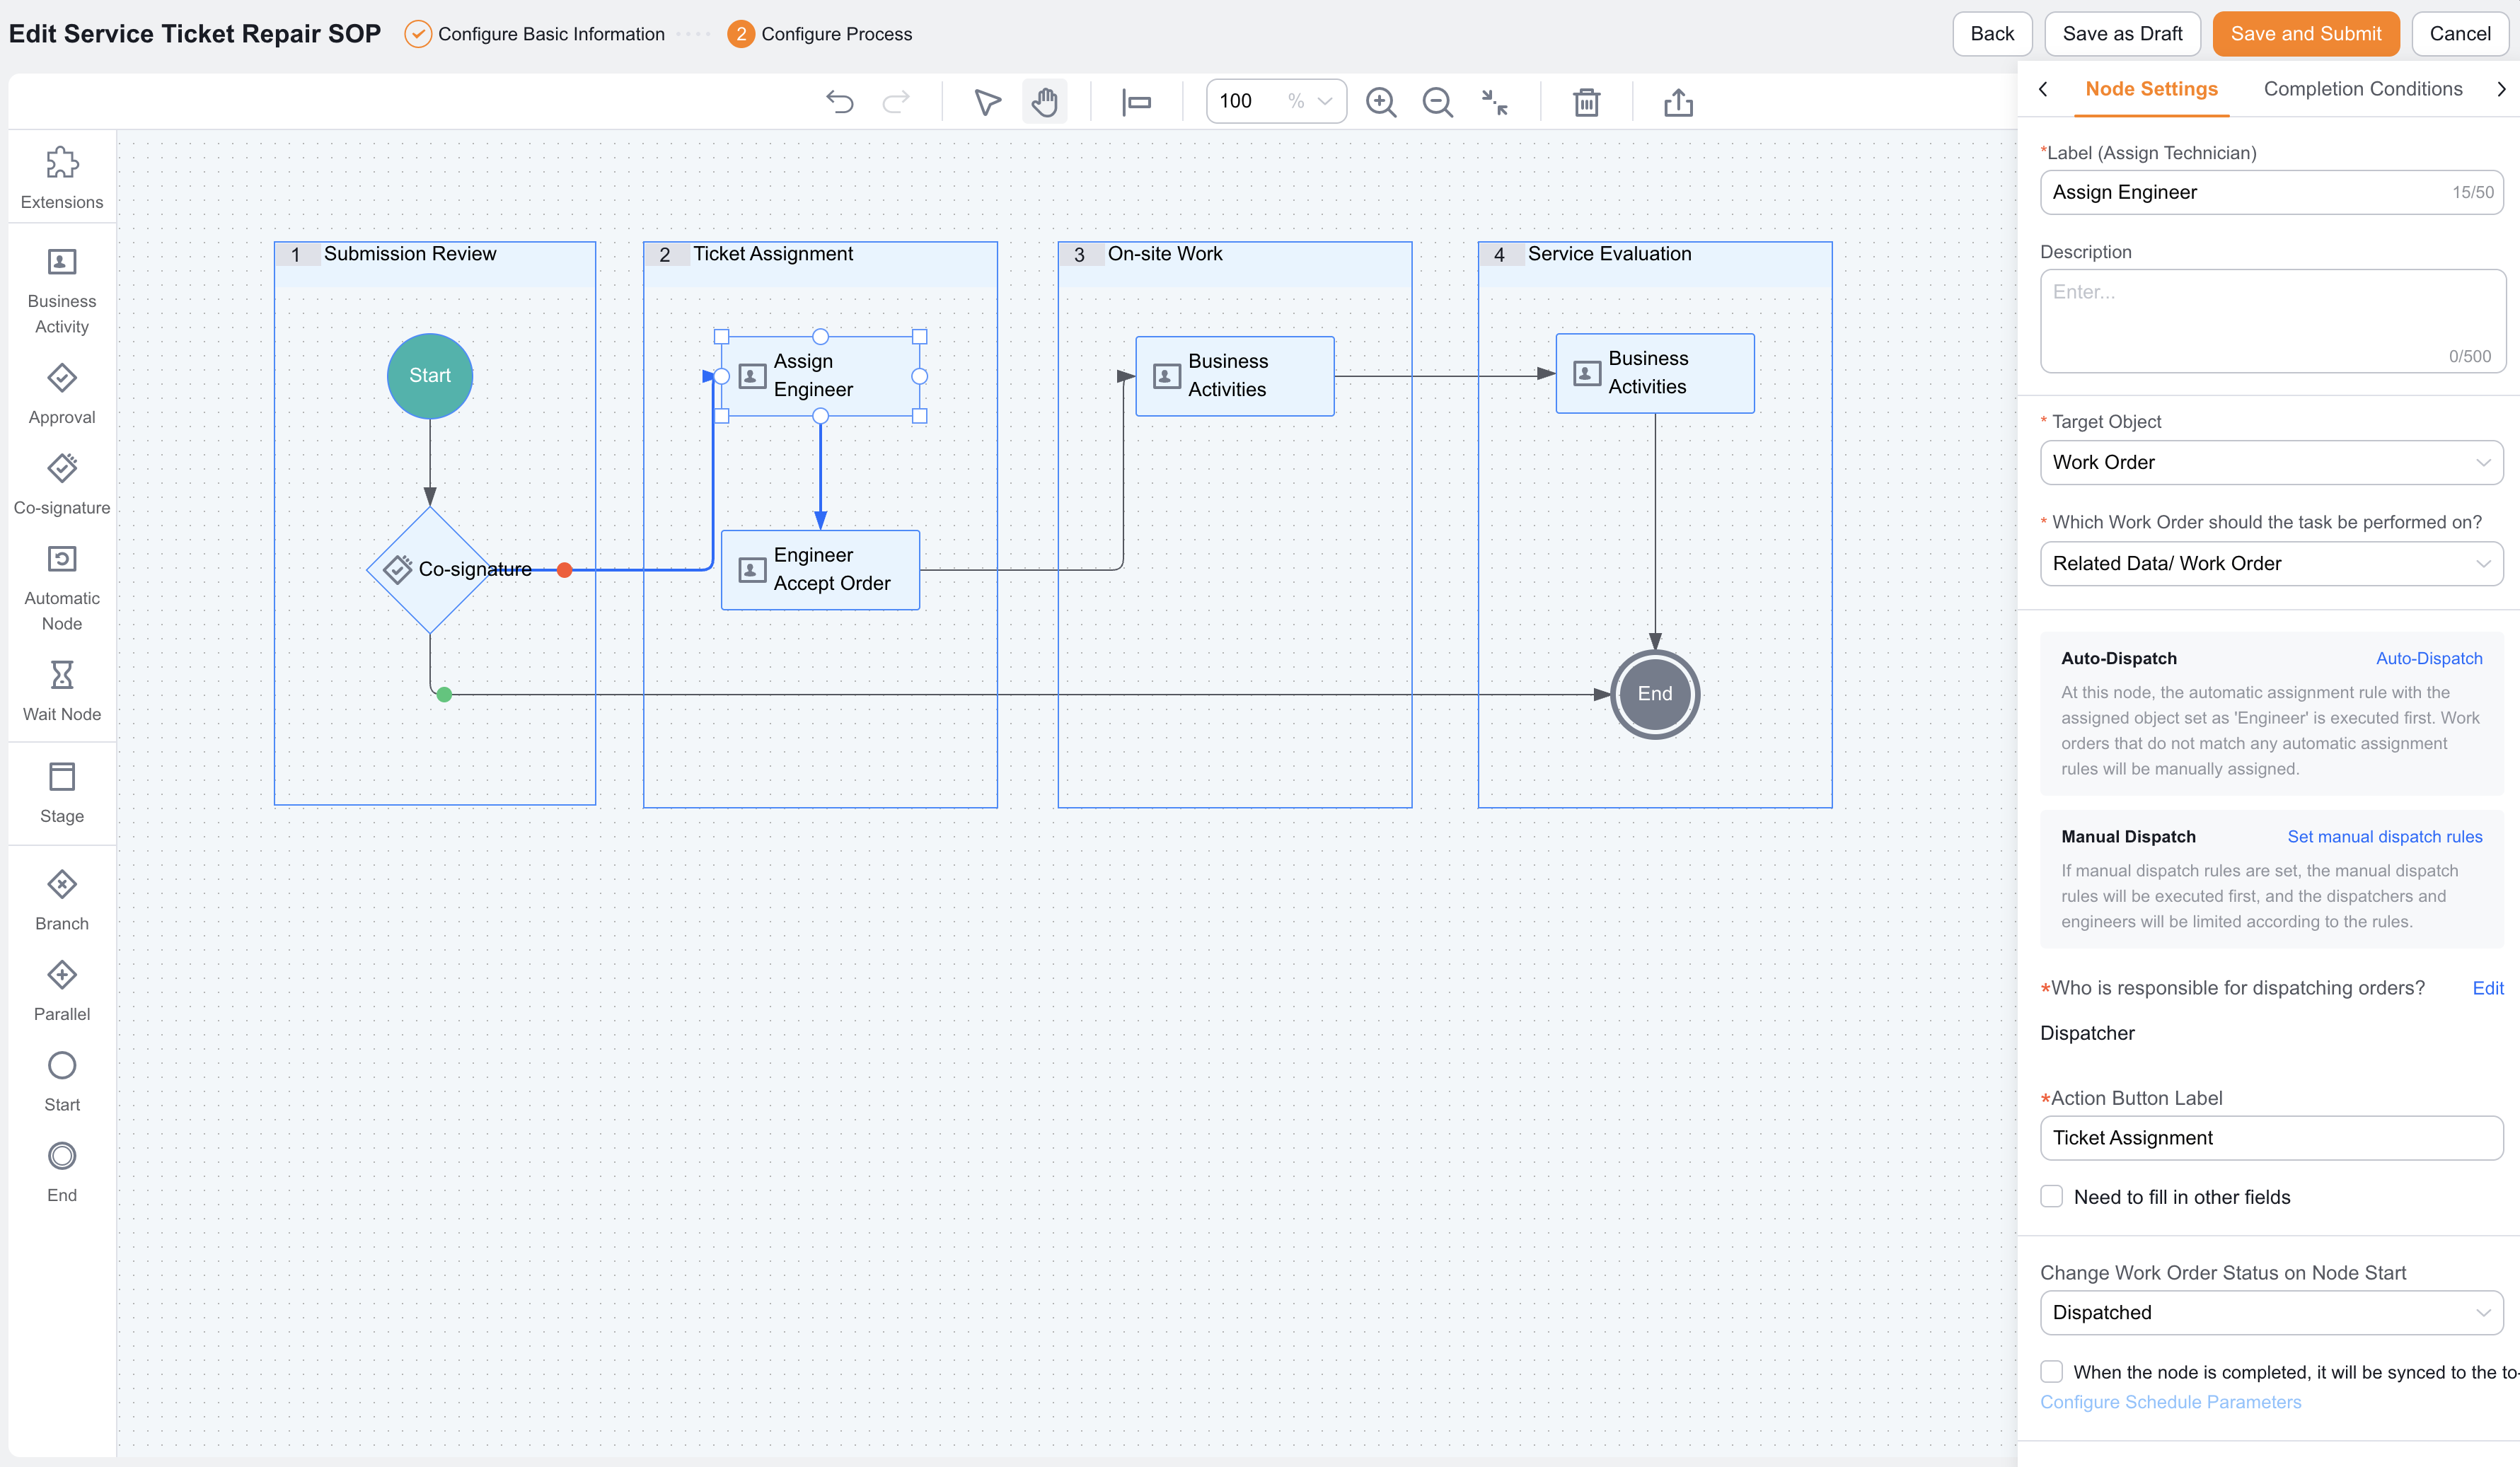
After you drag an extension element to the canvas and select the node, configure node information on the Node Settings tab on the right. Configuration items vary dynamically by business capability.
| Configuration item | Description |
|---|---|
| Node name | The Name of the current extension node on the canvas, in To-Do tasks, and in process records. Use a specific business action, such as Service Evaluation (Service Provider) or Account sign-off |
| Business description | Describes the processing goal of the current node and helps handlers understand the task context. The limit is 500 characters |
| Which object this Business Activity targets | Selects the main business object handled by the current extension node, such as Work Order |
| Which Work Order to execute the task on | Selects the data source actually handled by the node, such as related data / Work Order |
| Operation Type | Selects the industry business action that the node runs, such as order acceptance, dispatch, service, follow-up, or evaluation |
| Operation rules | Configures execution rules for the business action. Some nodes can redirect to an industry configuration page for further configuration |
| Operation interface | Selects the interface used by the handler, such as process layout, template, or industry application page |
| Who handles the task | Sets the Task Handler. You can select personnel, roles, variables, Service Provider Engineer, service group, or another business source |
| Set operation button names | Sets button labels on the handling page, and hides some buttons as needed |
| Auto-complete node | Sets whether the node automatically completes after a specified time to prevent long process stays |
| Change Business Status when the node starts | Sets the Business Status written automatically at node start, such as changing Work Order status to Service Evaluation |
| Task timeout duration | Sets the node handling deadline for reminders or exception handling |
The extension element selected in the screenshot is Service Evaluation (Service Provider). This node lets a Service Provider Engineer or related handler complete a Service Evaluation task.
Configuration steps:
The page prompt states that some Service Evaluation capabilities require object layouts for external terminal users. During configuration, also check the evaluation template, object layout, and Data Permission for external users.
Extension elements are usually registered to the process platform by business teams or industry applications. The platform displays, renders, and executes elements based on element configuration information.
A business element is the base definition of an extension element. It usually includes:
| Capability | Description |
|---|---|
| Basic Info | Includes element name, ApiName, node type, related object, and other metadata |
| Node type | Supports manual nodes and Automatic Node types, and determines whether handlers participate |
| Invocation method | Supports calling business capabilities by REST API or Function |
| Idempotency requirement | The execution interface for the extension element must support idempotency to prevent duplicate business results during process retry |
| Input parameters | Can include element definition information, extension information, object ID, object ApiName, task or node ID, instance ID, process Name, and other context |
When the invocation method is REST, you usually configure URL, Header, Result Body, and related information. When the invocation method is Function, the platform usually calls custom logic by FunctionApiName.
Extension elements can be managed and displayed by group. A group usually includes a group name and ApiName. When an element is registered, its group, node type, and related object can be specified. This helps administrators find nodes by Business Scenario on the left side of the canvas.
Extension element rendering and execution usually have two layers:
| Type | Description |
|---|---|
| Element rendering | The platform displays draggable nodes in the extension elements panel based on element definitions and extension configuration information |
| Node rendering | After a node is dragged to the canvas, the platform displays configuration items in the right panel based on element configuration information and current node Basic Info |
| Node execution | When the process reaches the node, the platform calls the industry business capability based on node configuration and passes object, task, node, and process instance context to the business side |
Extension node completion conditions control whether the handler can complete the current node. Configure rules on the Completion conditions tab on the right.
Common completion conditions include:
| Condition type | Description |
|---|---|
| Based on fields | Use for rules such as Evaluation result must be filled in, Sign-off status must be confirmed, or Service report must be uploaded |
| Based on APL code | Use for cross-object validation, advanced calculations, or combined rules |
Configure clear prompts for key completion conditions so handlers understand which information to add.
After an extension node is completed, you can configure post-actions on the After completion tab on the right. Use post-actions to update data or trigger later operations. Common post-actions include field update, SMS notification, Initiate Business Process, Email Notifications, External Notification, Execute APL code, Change Owner, data lock or unlock, create task, create schedule, New Sales Record, Sales Records, change team members, variable assignment, and Conversion Rules.
For more post-action configuration, see Configure post-Business Process actions.