Appearance


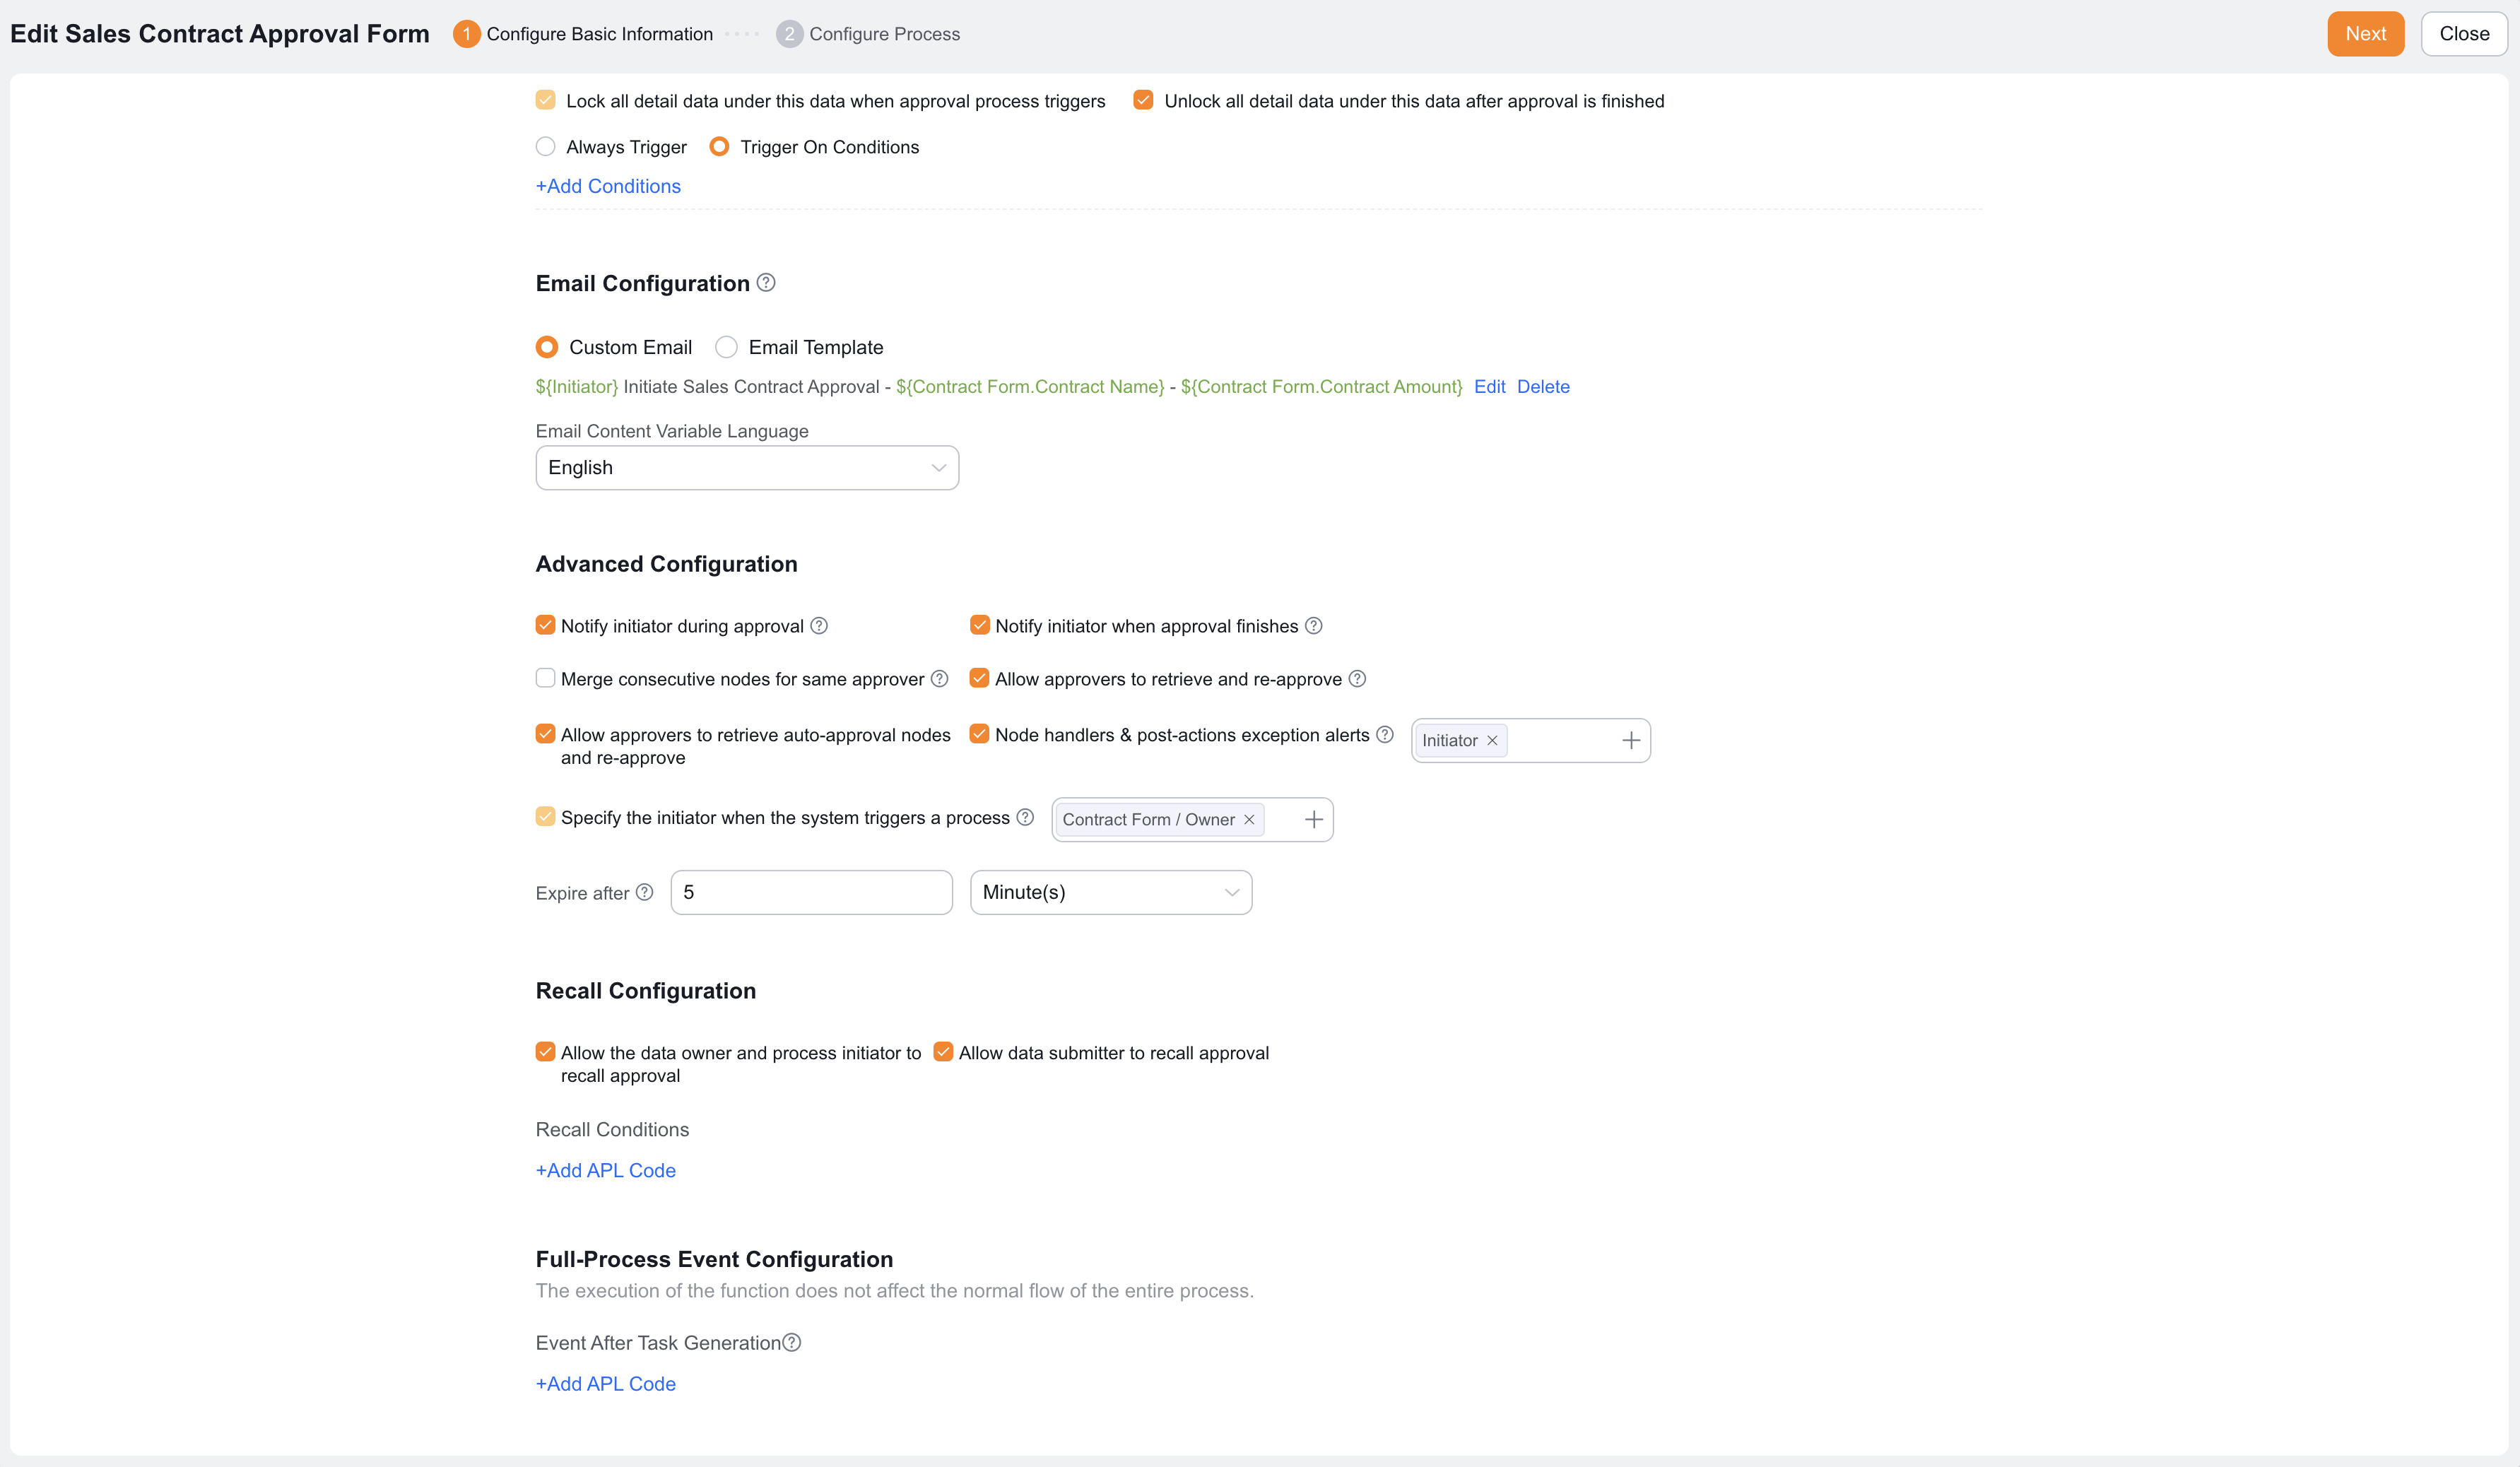
Configure approval basic info, triggers, filters, and advanced settings.
An Approval Process submits qualifying data to Designated Personnel for approval. When you create an Approval Process, configure basic info first. Then configure triggers, filters, email approval, advanced settings, and whole-process functions.
| Configuration item | Description |
|---|---|
| Approval Process Name | Used for display and later calls. The maximum length is 100 characters |
| API Name | Unique process identifier for code calls. You cannot change it after creation |
| Approval Process Description | Describes the process purpose. The maximum length is 500 characters |
| Initiator identity | Supports Data Submitter and Data Owner |
| Enable External Approval | Allows external users to start approval, such as agent connector, service connector, and Channel Portals users |
The data submitter and data owner can be different users. For example, if assistant A creates an opportunity for sales rep B, A is the data submitter and B is the data owner.
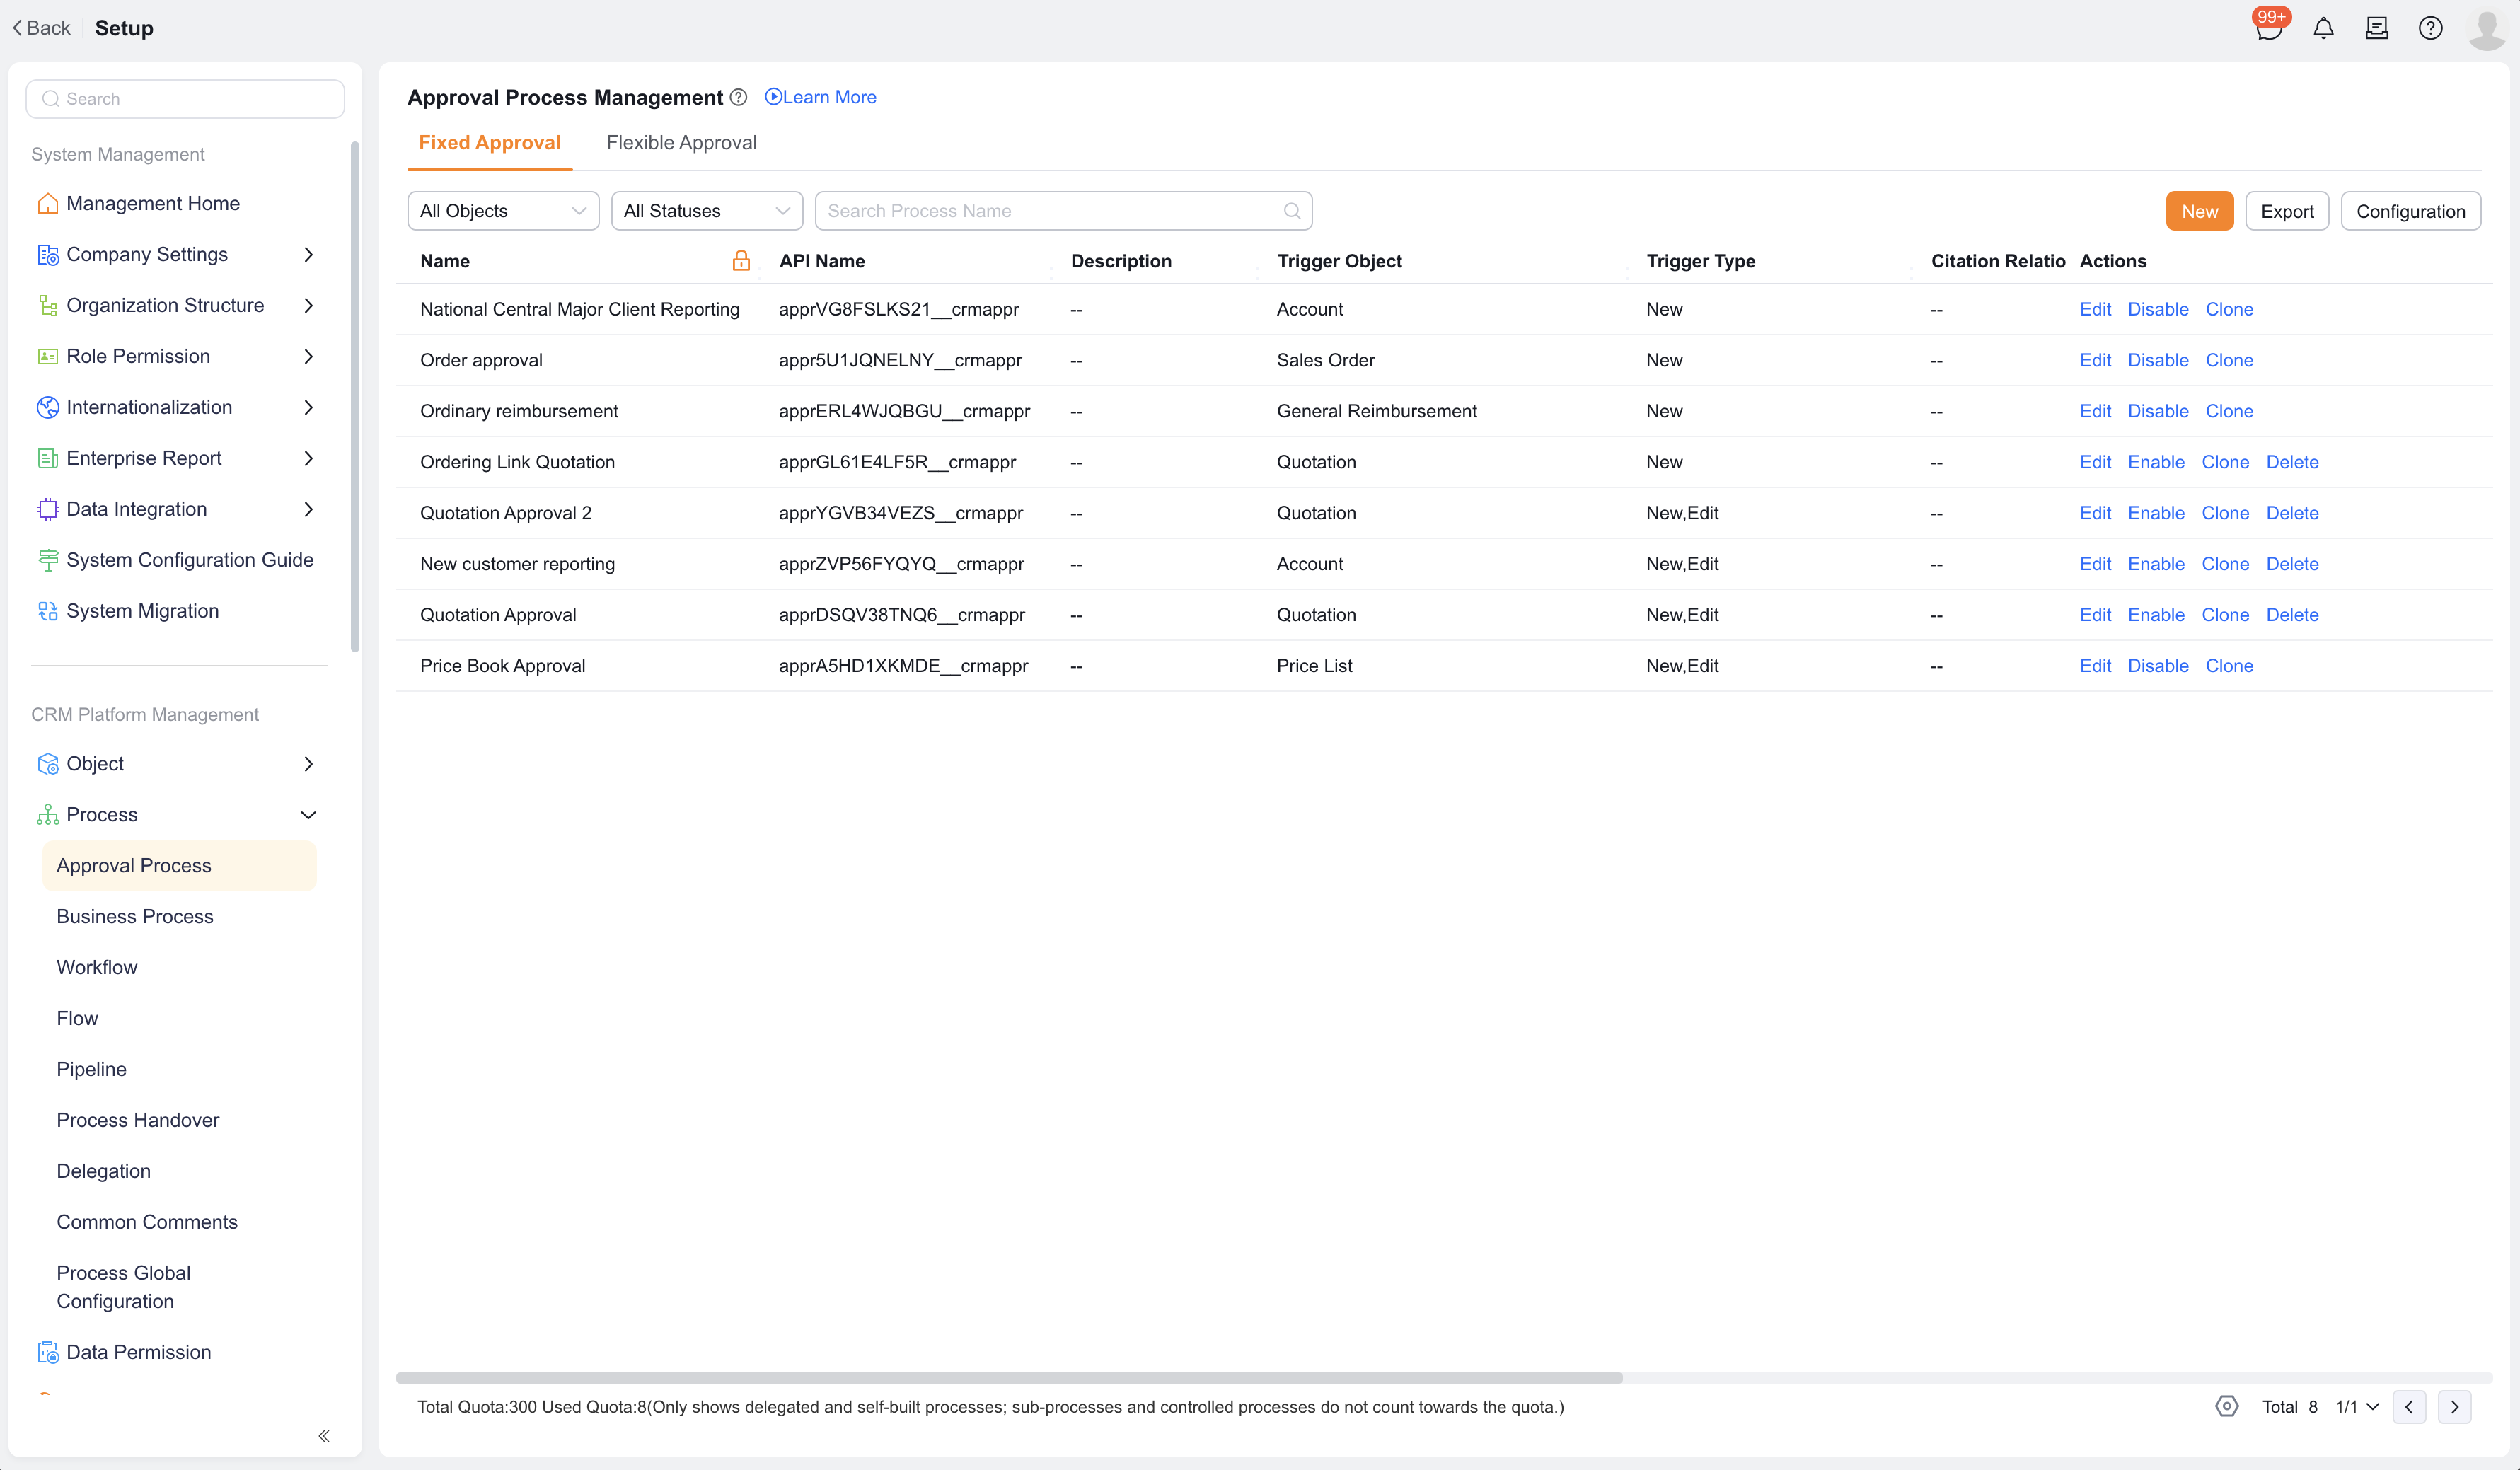
A trigger defines when the Approval Process starts automatically.
| Configuration item | Description |
|---|---|
| Object | Supports standard objects and custom objects. Child objects are not supported |
| Trigger type | Create, edit, void, change owner, stage change, partner change, claim, return, invalidate, request extension, convert, and more |
| Master-detail object constraints | Locks child data when approval is triggered, and unlocks child data after approval is completed |
| Trigger method | Always trigger or trigger when conditions are met |
| Email configuration | Supports custom email or email templates, and lets you set the language for email content variable values |
WARNING
You cannot change the trigger object after saving it. Filters and post-node actions depend on this object.
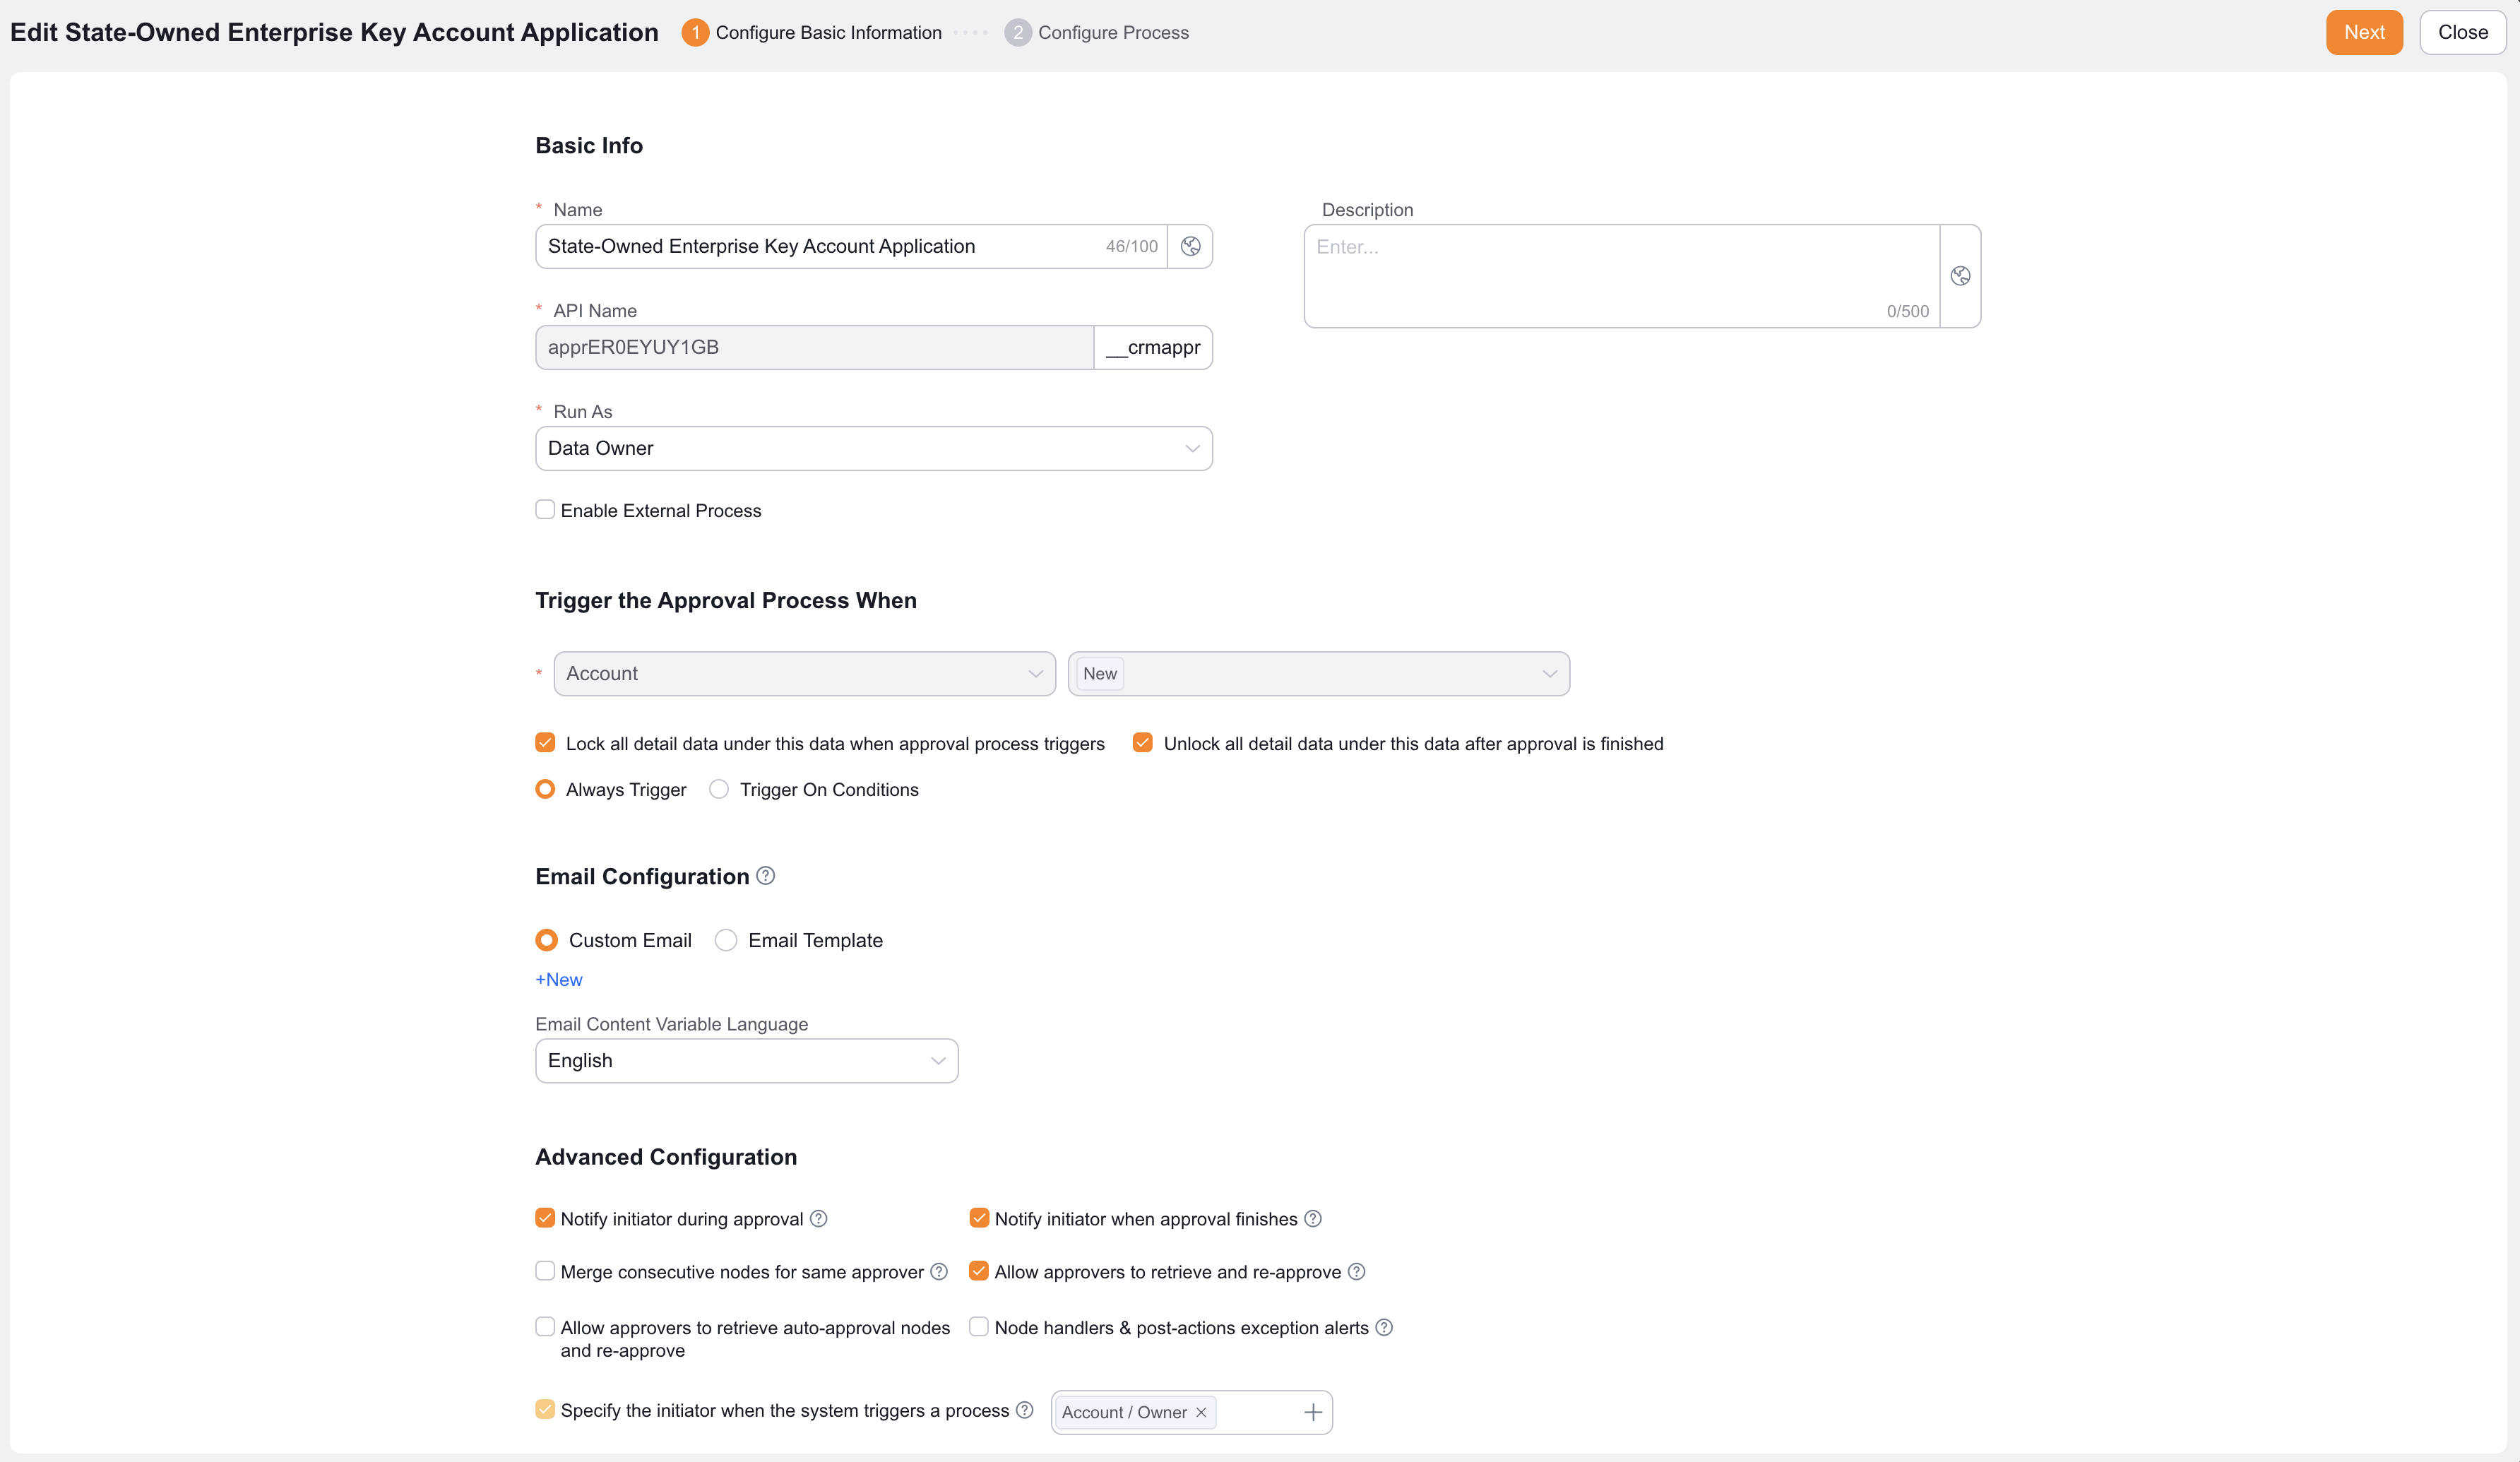
Trigger conditions and filter conditions support field types such as multi-select, single select, image, number, email, Boolean, Date Time, mobile number, single-line text, percentage, time, department, collaborative rich text, date, user, attachment, Formula, Roll-Up Summary, multi-line text, amount, multi-select user, URL, multi-select department, and date range.
A filter further limits which data runs the Approval Process and post-node actions.
Filter conditions support:
Approval Process filter conditions support before-change, during-change, and after-change states.
| Type | Description |
|---|---|
| Before change | Triggers when the field value before change equals the specified value |
| During change | Triggers when the specified field changes |
| After change | Triggers when the field value after change equals the specified value |
Time and numeric fields support variable filtering. Variables can come from trigger object fields or same-type fields under lookup-related objects of the trigger object.
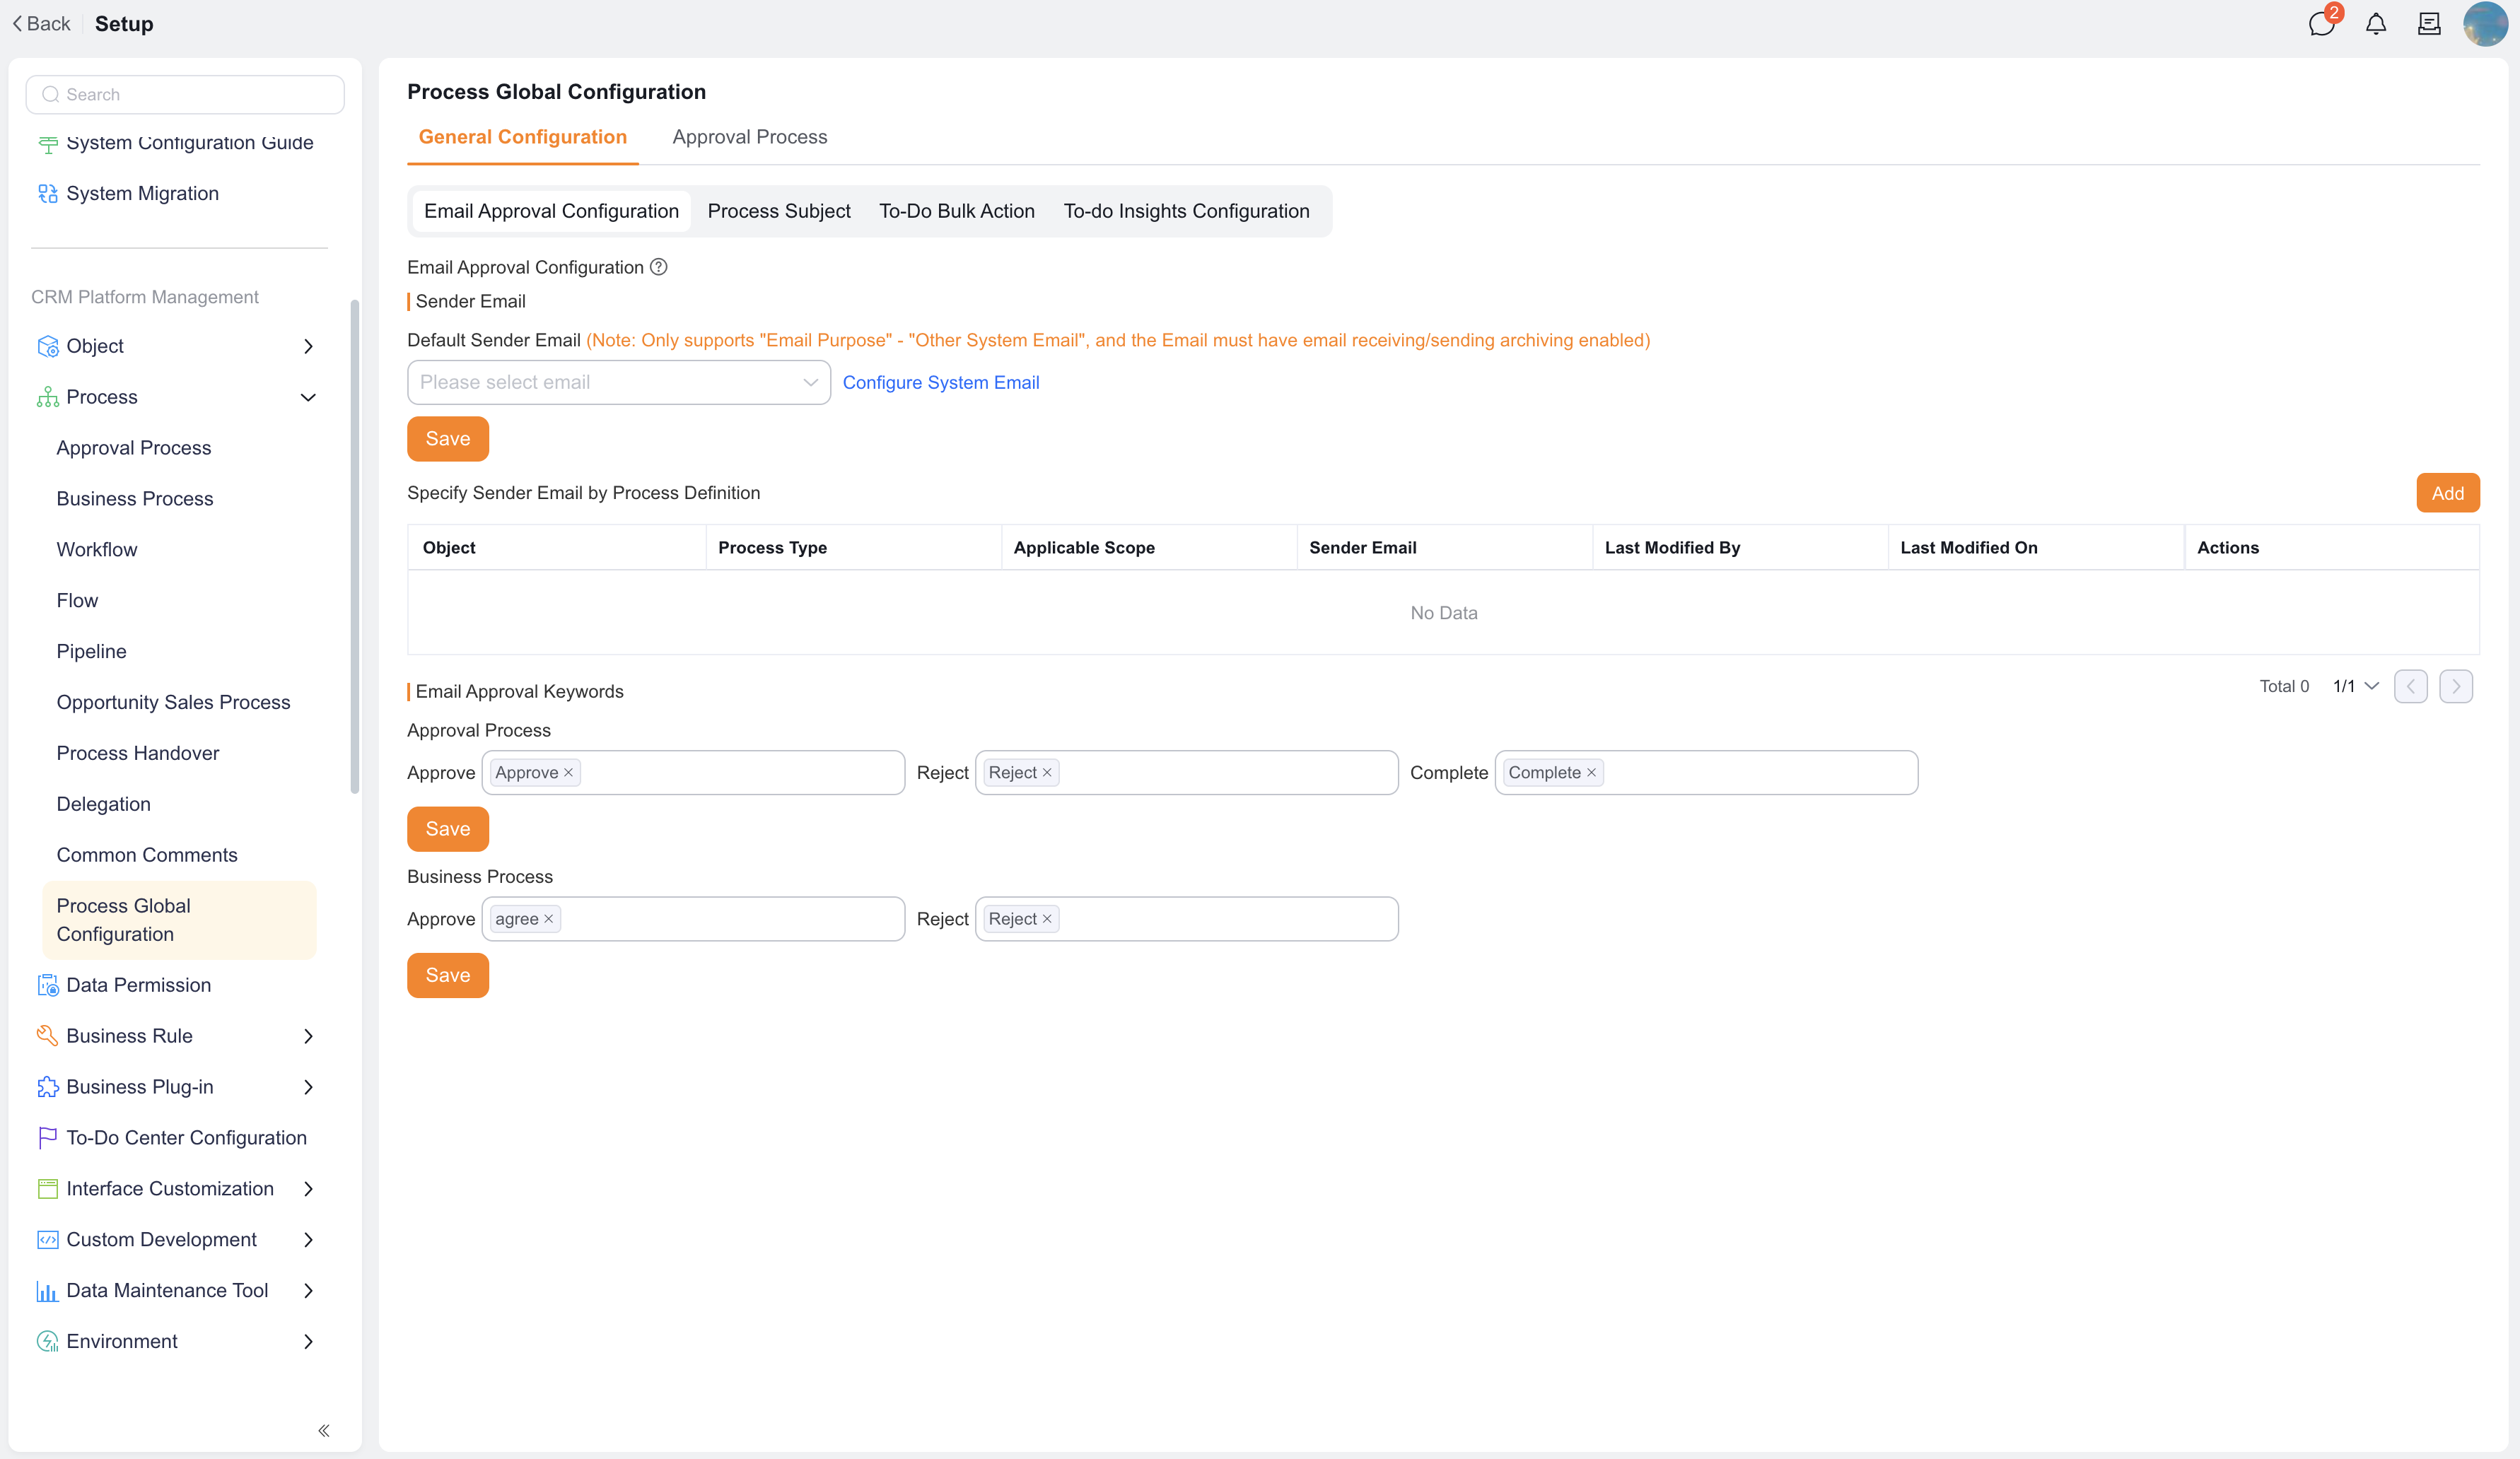
Email approval lets approvers view and handle approvals by email.
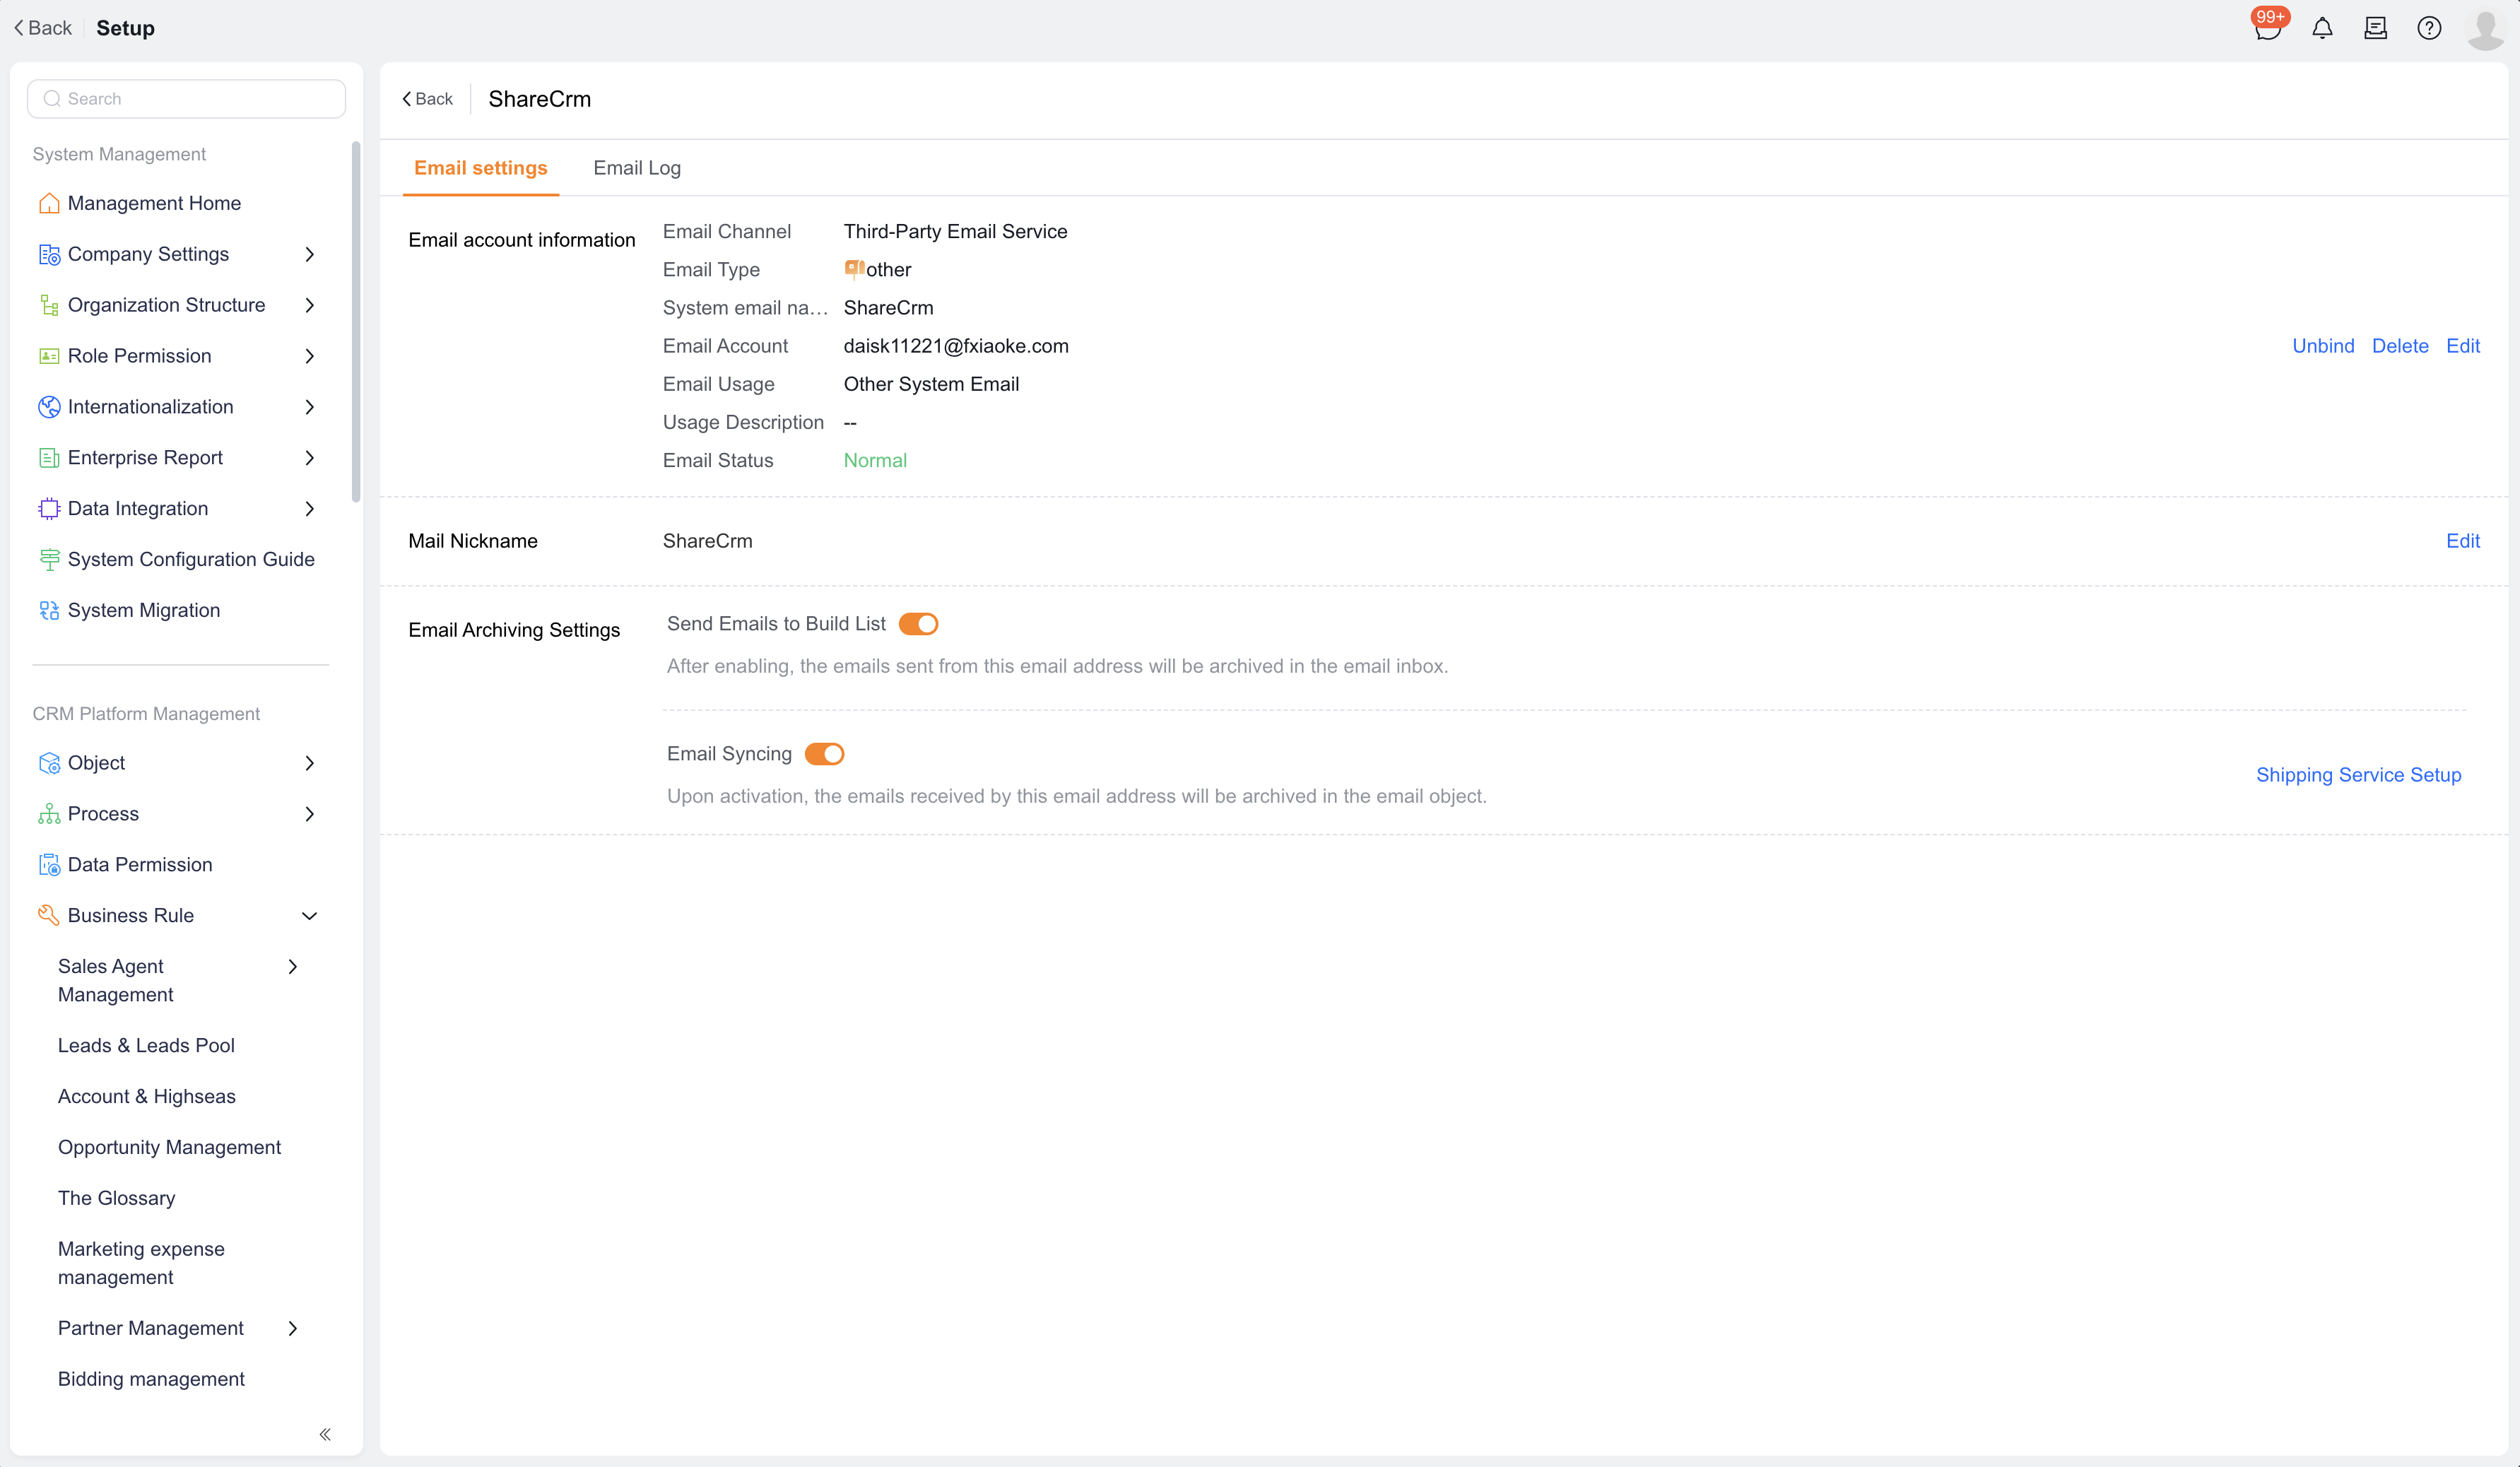
Admins can set email approval keywords in Process Global Settings.
| Operation | Default keywords |
|---|---|
| Approve | Approve, Agree |
| Reject | Reject |
| Complete | Complete |
Keyword rules:
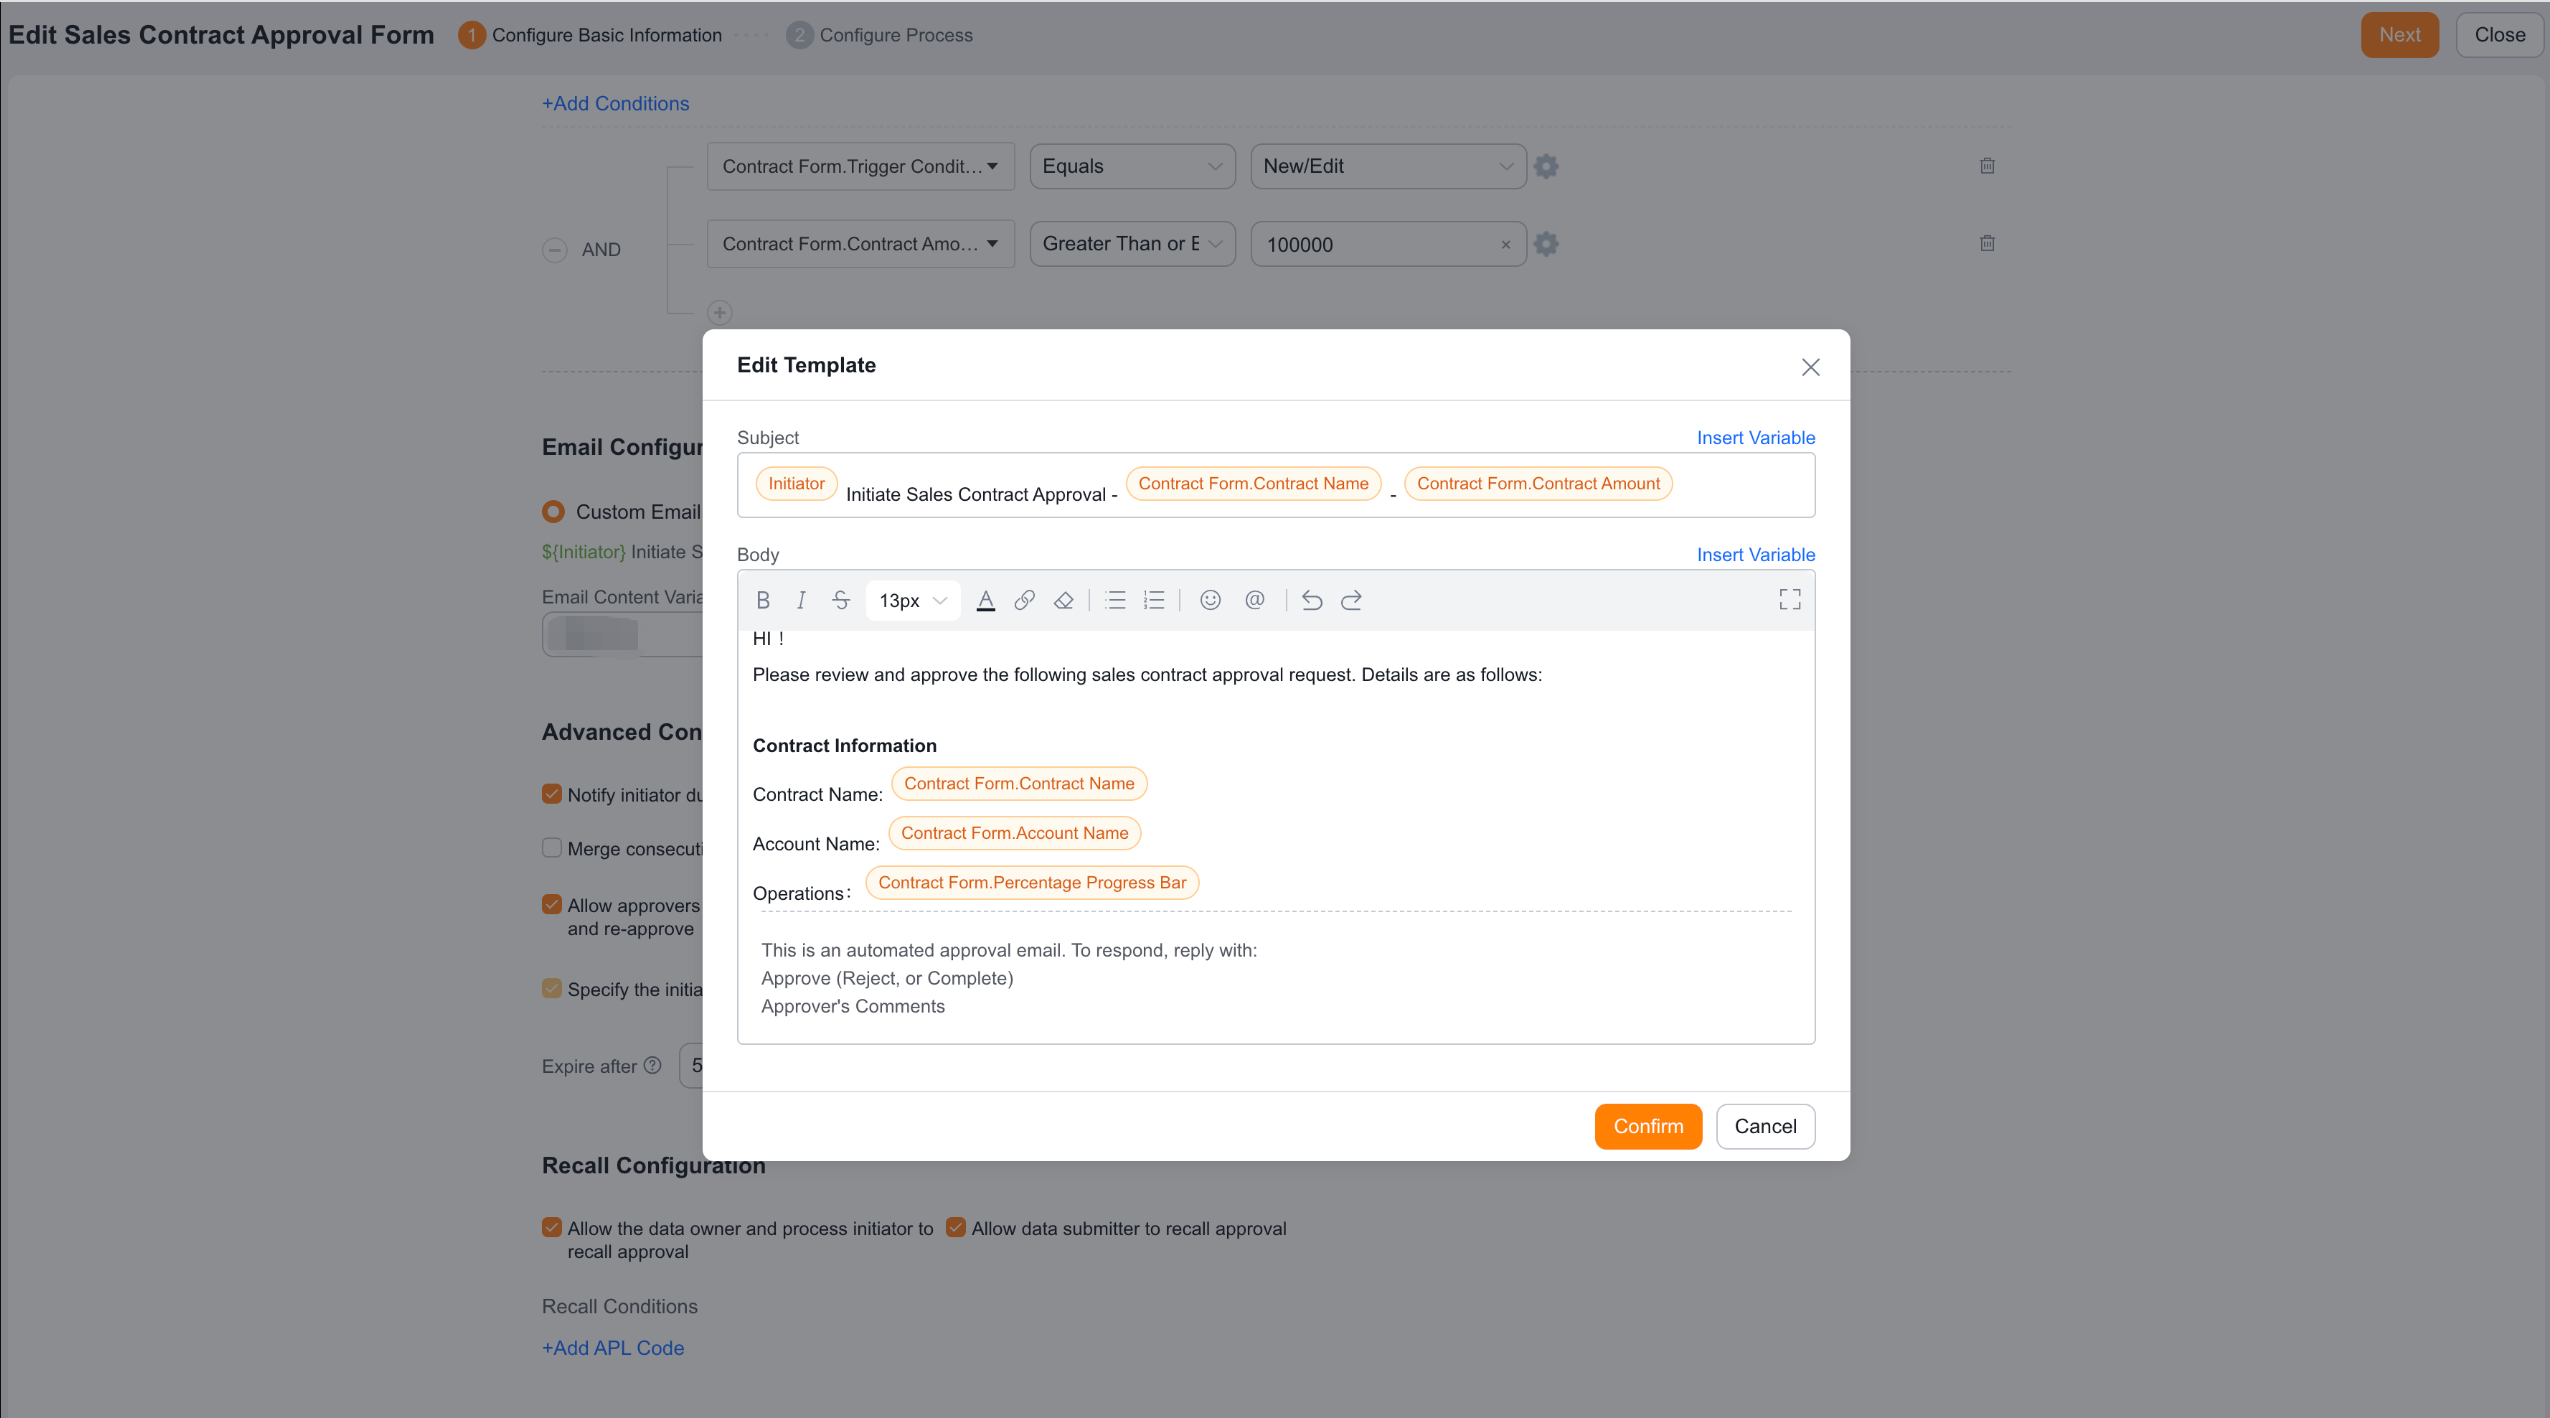
Email templates support an email subject, email body, and language for email body variable values.
The email subject and body can insert:
The email body supports HTML. When the system sends the email, it automatically adds the approval email remark content.
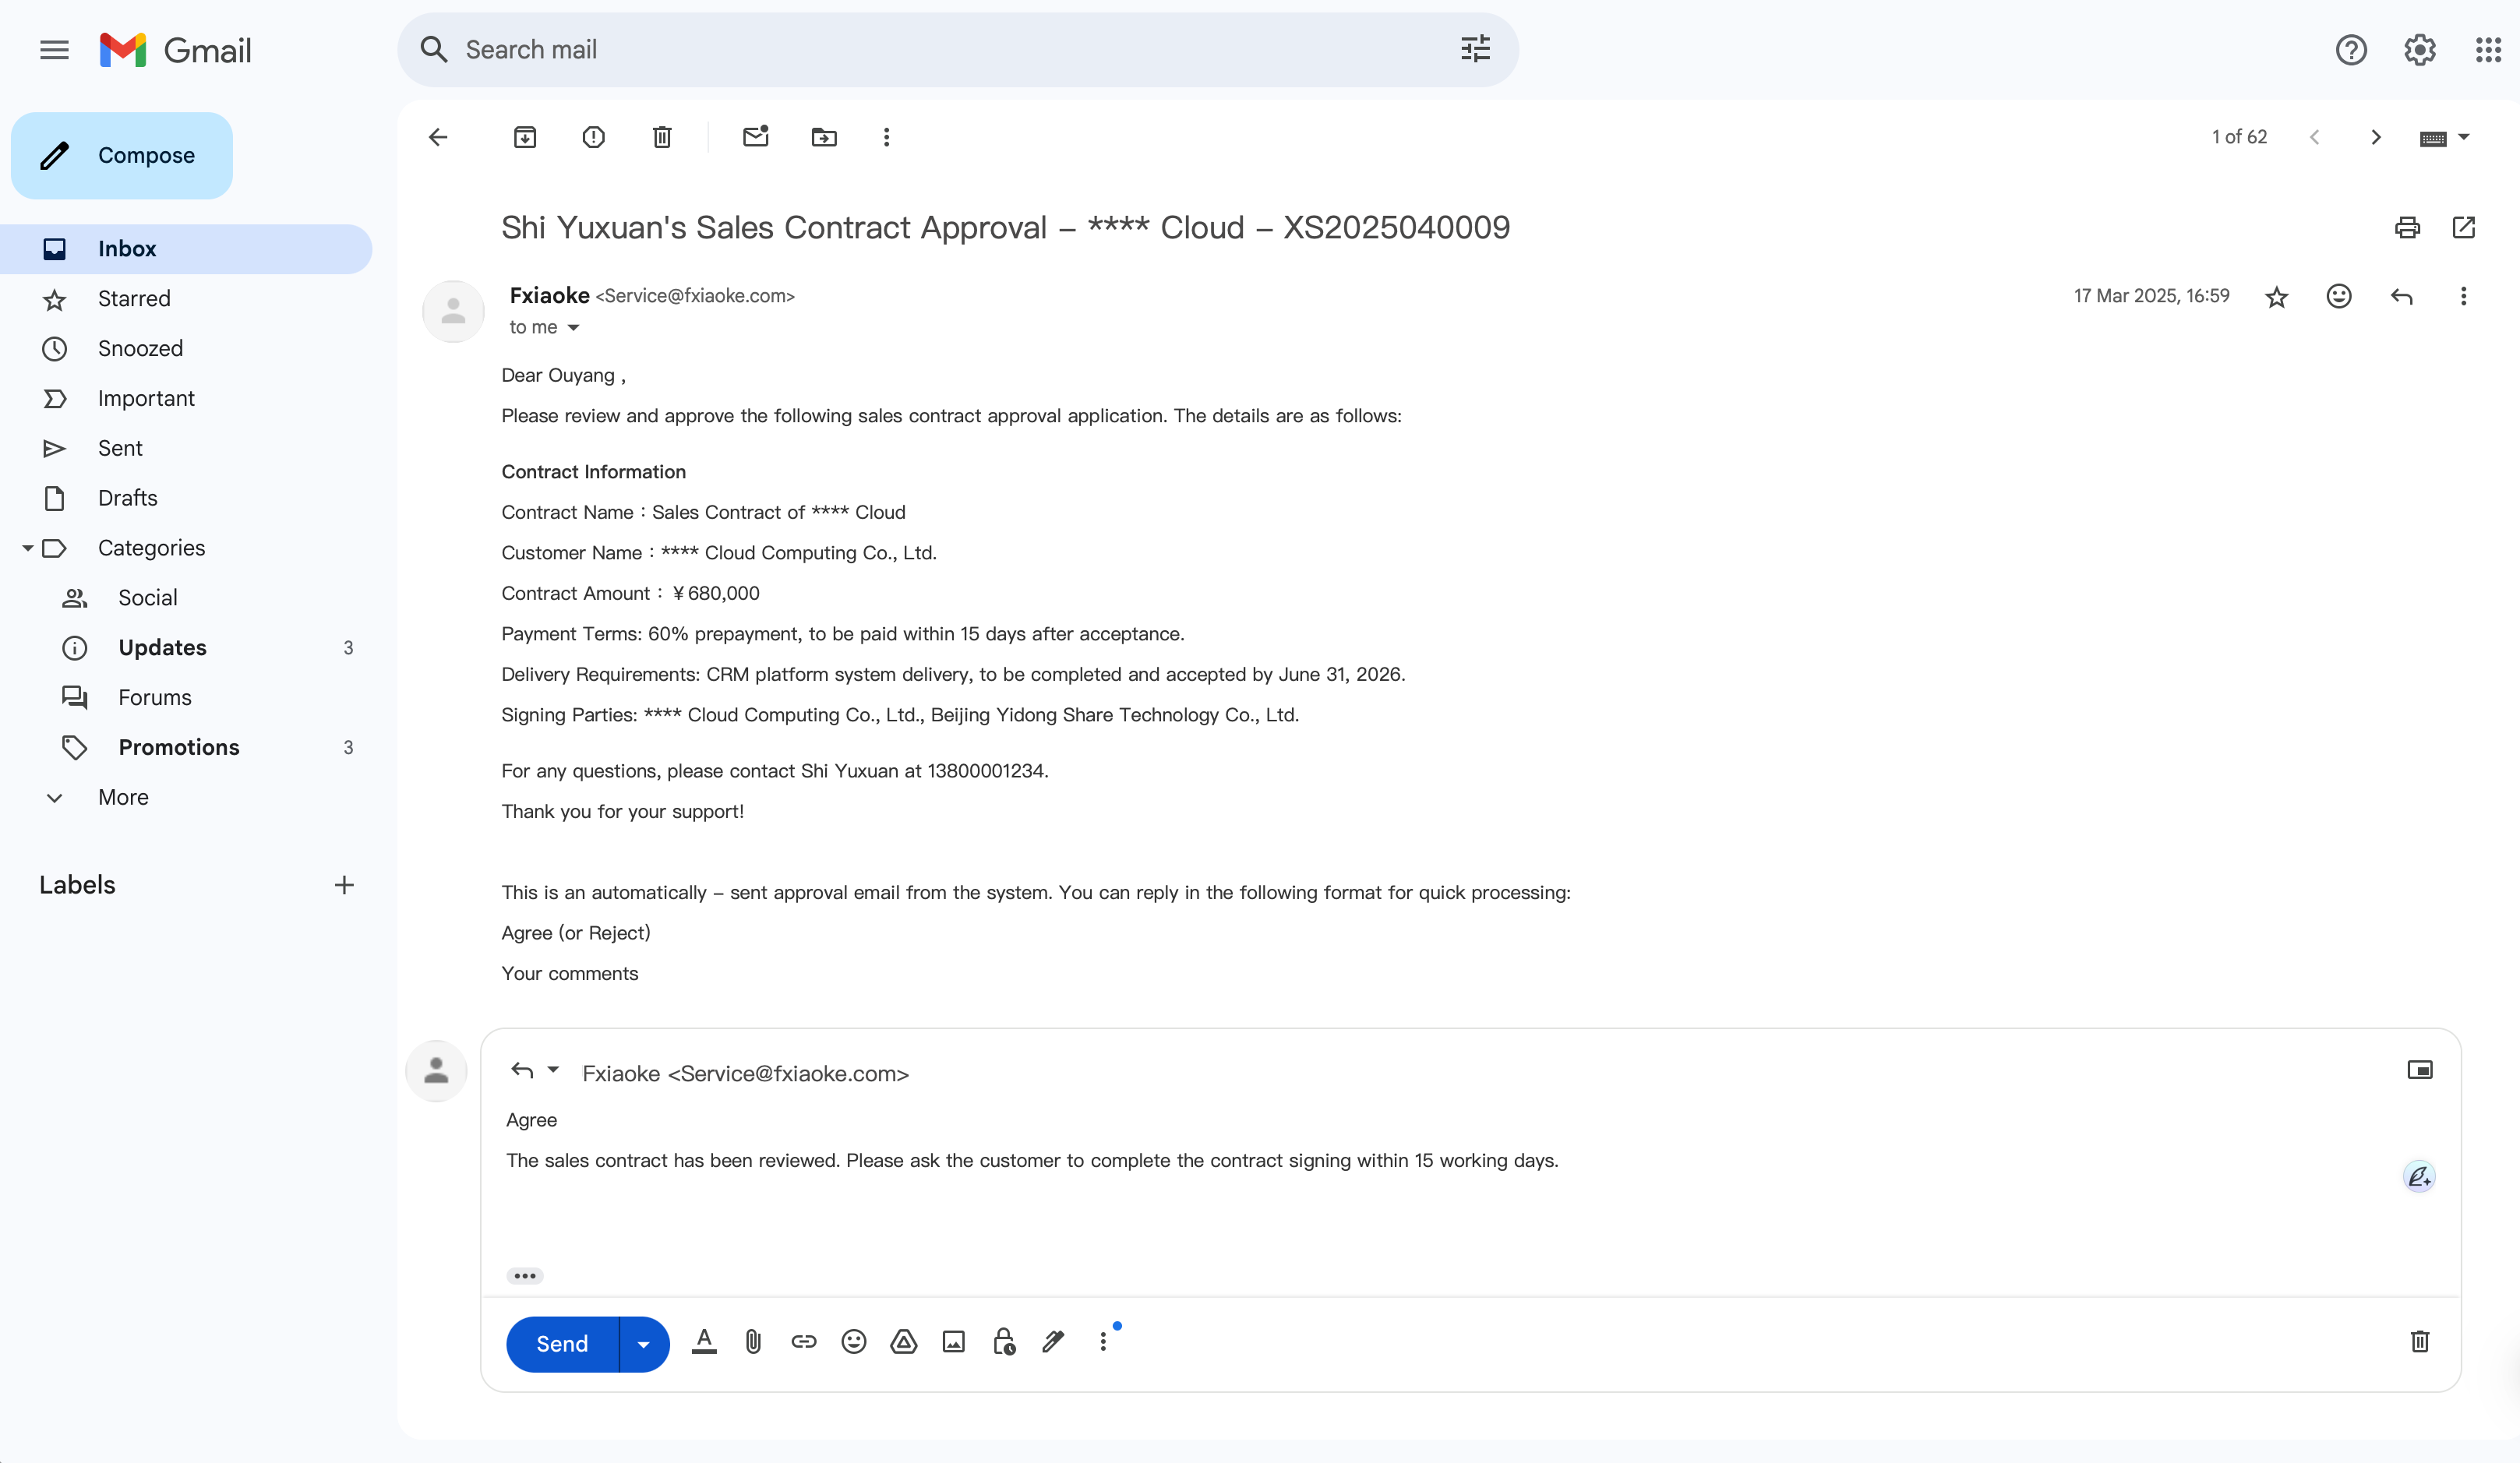
When an approver replies to an email, the first line is the approval keyword and the second line is the approval comment. The approval keyword is required, and the approval comment is optional.
| Setting | Description |
|---|---|
| Send results to initiator during approval | Notifies the initiator after each approver acts |
| Send results to initiator after approval is completed | Notifies the initiator after final approval or rejection |
| Merge handling for the same approver in consecutive nodes | Merges handling when consecutive nodes have the same approver |
| Allow approver to Retrieve and re-review | Allows Retrieve before the next Approval Node approves |
| Allow Retrieve after automatically approved nodes and re-review | Allows Retrieve and re-review for automatically approved nodes |
| Post-node action exception reminder | Reminds specified handlers when the process has exceptions |
| Specify initiator for system-triggered processes | Specifies the initiator for APL function or API triggers |
| Process deadline | Sets the circulation duration of the entire Approval Process |
The process deadline must be a positive integer. Supported units are minutes, hours, and days.
Whole-process event configuration can skip empty Approval Nodes.
After configuration, the system changes the assignee of an empty node to the system and skips the node automatically. It also marks the approval comment as automatically skipped.
WARNING
After a node is skipped automatically, the system ignores post-node actions and Completion Conditions on the current node. After you change the process definition, historical data does not run again.